Zend Framework 2 provides Internationalisation (I18N) support. In this post I will give you instructions how to configure Zend Framework 2 to work with translation of your ZF2-Modules using PoEdit step-by-step. It may seem like yet-another Zend Framework 2 and PoEdit instruction. I’m writing it, because I haven’t found any complex instruction from the beginning to the end, how to start with Internationalisation and configuration of localizing in Zend Framework 2.
Configure localizing in Zend Framework 2
In your Application module_config.php add alias to MvcTranslator:
'service_manager' => [
'aliases' => [
'translator' => 'MvcTranslator'
]
],
This step is not required but it helps you to manage of “translator” configure section in every module.
Next, add “translator” configure section in your module_config.php:
'translator' => [
'locale' => 'en_GB',
'translation_file_patterns' => [
[
'type' => 'gettext',
'base_dir' => __DIR__ . '/../language',
'pattern' => '%s.mo'
]
]
],
Do not forget to create “language” directory in module. Your module’s directories should look like this:
/- module
|-/ NAMESPACE
|-/ config
|-/ language
|-/ src
|-/ view
|- Module.php
^
Download and configure PoEdit
First of all, you must download PoEdit from project site and install it. Next, open PoEdit and go to menu: File > Preferences > Extractors tab. Find PHP on list and edit it. Be sure that you have *.phtml in List of extensions, if not, add it.

How to create language files
In this step I will show you how to create *.po files.
Open PoEdit and go to menu: File > New.
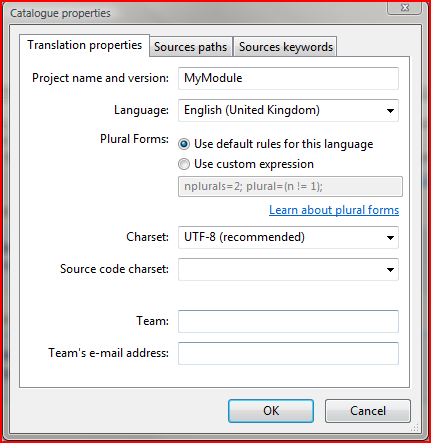
Select language which you want to translate, example: English (United Kingdom)

Then press OK. After that, save your en_GB.po file (press save) in your module’s “language” directory. Next, you have to set up special properties for en_GB.po - go to menu: Catalogue > Properties.
In “Translation properties” set up name project:
Open “Source paths” tab and set “Paths” like this:
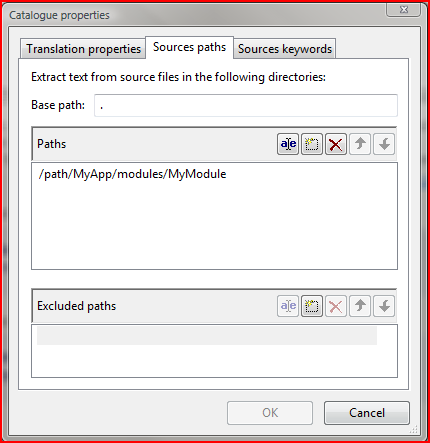
“/path/MyApp/modules/MyModule” is the path to module in your application which you want to translate.
In “Sources keywords” tab add: translate
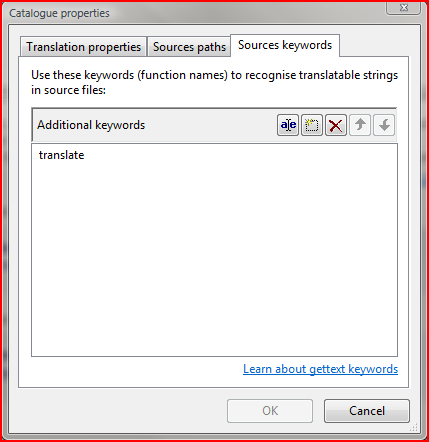
This keyword (translate) tells PoEdit that it should find all expressions in your module: translate; PoEdit finds every call of translate helper in your module.
Press “Update”.

Then, in the “Source text” PoEdit will find and show every text to translate.
Use translate in Controllers
To add keywords to translate in your Controllers you can simply use:
$this->getServiceLocator()->get('translator')->translate('Text to translate');
Of course, it’s possible to translate texts in module class by passing translator object to them, but it’s strongly discouraged. You shouldn’t mix application and business logic.
Recognize of language client
In the end, you would like to set up selected language and translation to a user automatically, when user is visiting website. In Module.php simply add this:
$translator = $e->getApplication()
->getServiceManager()
->get('translator');
$translator
->setLocale(
\Locale::acceptFromHttp(
$_SERVER['HTTP_ACCEPT_LANGUAGE']
)
)
->setFallbackLocale('en_GB');
$_SERVER['HTTP_ACCEPT_LANGUAGE'] - gets the accepted languages from a browser. Module will be translated if application has the same *.po file as language sent by a browser . If not, “en_GB” will be set as a default language in setFallbackLocale('en_GB') method.
To use \Locale be sure that you have the intl-extension running. You must have
extension=php_intl.dll
enabled in your php.ini file.
In Module.php you can set your own methods to set language. It could be automatically set up as I showed you above or you can implement your own policy. It depends on your own preferences and needs.